Detachable Leg Joint Custom Tutorial
How to use a LEGO Technic pin to create a detachable leg

Please wait...
If you need a way to quickly detach body parts, LEGO pins and connectors usually have the hardware you're looking for.
For this mod I wanted to use as few pieces as possible, and ended up only needing one; a LEGO Technic 1/2 Pin.
Things you'll need:
-LEGO 1/2 Pin (pronounced "half pin")
-Super glue
-Self-hardening clay (ex: Apoxie Sculpt)
-Rotary tool
-Cutting disc
-Cylindrical grinding bit (thinner than the stud on the LEGO pin)
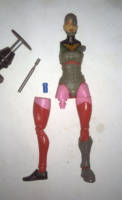
•Pop off the leg at the thigh swivel and use the cutting disc to remove the peg. You can hold the cutting disc on its side to make the surface flush if needed, or just use a file.
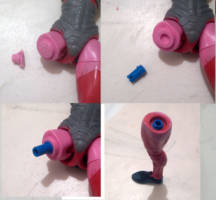
For this figure specifically, don't cut off the raised circular part.
•Use the grinding bit to carefully create a cavity where you can securely plug in the pin's stud. A snug fit is best.
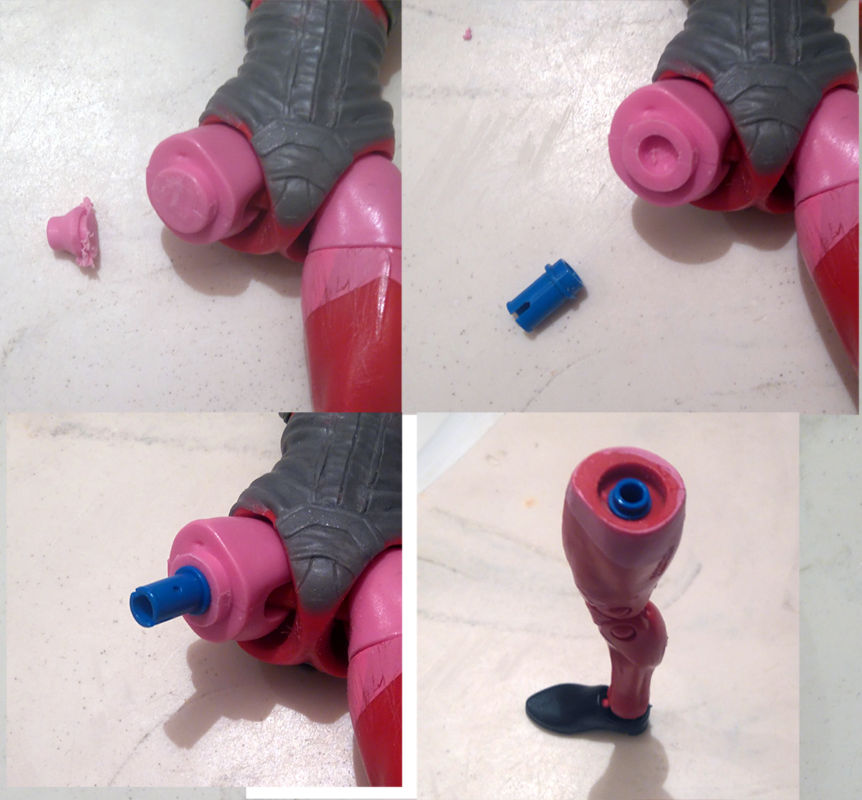
•Test fit the parts. If there's a little gap at the swivel, shave down the raised circular area on the pink hip piece a little bit at a time until the gap disappears.
•Once the fit is to your liking, super glue the stud into the cavity.
DO NOT glue the pin, that part goes into the thigh. The bottom right picture is just there to show you how deep the pin goes into the thigh.
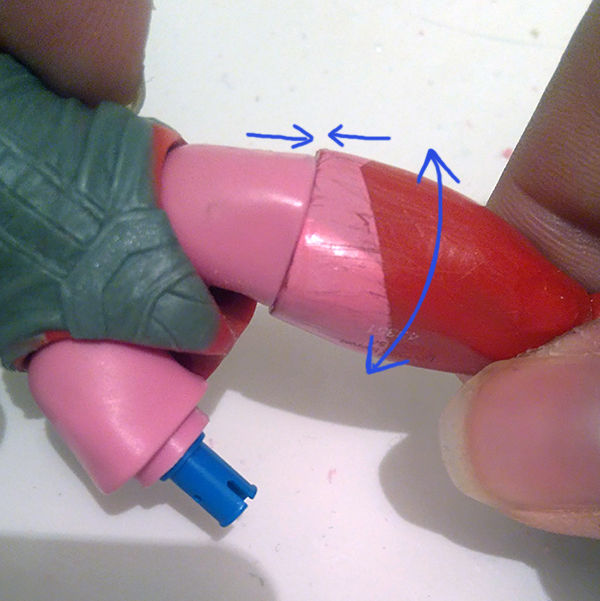
•Once the glue is dry, test fit again. If the swivel is too loose, stuff a little Apoxie Sculpt in the thigh's hole and smush it around the sides. Try not to get clay jammed up the center of the pin.
•Press the parts together so they're flush, then use a twisting motion to mush the clay around. While this is hardening, use the same motions every hour or so to keep the clay from locking up the pin.
It's a good idea to use a quick-hardening clay, that way you can just keep the parts pressed together and twisting for like 5 minutes and be done, instead of waiting hours for apoxie sculpt to harden.
Once that's hardened, pull off the leg and it should pop off with a little effort. If there's too much clay inside the pin, just drill it out carefully. What you want is for the tips of the pin to flex a little, this is what lets it hook into the thigh securely while still letting you pull the leg off when you want.
Disclaimer
Customize at your own risk!
Customizing can be a fun, but dangerous hobby. These tutorials are contributed by other customizers. Some of the things recommended in the tutorials may be dangerous, such as the use of boiling water or sharp objects. You shouldn't attempt anything mentioned without adult permission and supervision. Figure Realm and/or the authors of the tutorials are not liable for any injuries or damages occurring from any attempt to follow suggestions in these tutorials.
User Comments
Custom on eBay
Previous / Next Custom Tutorial


 Update Your Tutorial
The great thing about larger figures is you have more room to work with.