Making a Sheath Custom Tutorial
Don't like the sheath that your figure came with? Or your figure doesn't have one to go with their sword? Let's make your own!

Please wait...
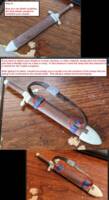
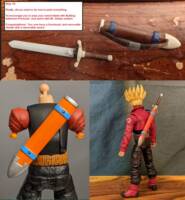
No sword should be without one! Now you can make your own sheath. I used this technique to make one for a modified DCUC Deathstroke sword. Those props now belong to my custom Trunks.
This technique can also be used to make a sheath for daggers, knives, and other bladed weapons. In fact, with enough creativity, you should also be able to use this method to make holsters for firearms and even for fantasy weapons.
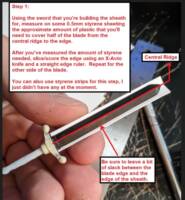
The pictures used in this tutorial depict a sheath being made for a diamond bladed sword, but can be modified for other types of swords. Another great idea is to use a rectangular styrene 'box tube' that are sold at various hobby stores.
Needed Parts and Recommended Tools:
-0.5mm Styrene Sheeting (Plastruct was used in this tutorial)
-Straight Edge Ruler (Metal highly recommended)
-X-Acto Knife with plenty of spare blades
-Cutting Mat
-Side Cutters
-Super Glue (Gel Control highly recommended, I used Loctite)
-Sculpting Materials of your choice, along with sculpting tools that you prefer to use
-Sandpaper (Various Grades)
-Respirator (For Sanding)
-Your Favorite Paints and Brushes
Thank you so much for checking out this tutorial, and I hope that you have found it helpful!
And a big thank you to Jin Saotome. Without all of your tutorials that I found on your website, I never would have learned how to customize, or found my way here to figurerealm.
Disclaimer
Customize at your own risk!
Customizing can be a fun, but dangerous hobby. These tutorials are contributed by other customizers. Some of the things recommended in the tutorials may be dangerous, such as the use of boiling water or sharp objects. You shouldn't attempt anything mentioned without adult permission and supervision. Figure Realm and/or the authors of the tutorials are not liable for any injuries or damages occurring from any attempt to follow suggestions in these tutorials.
User Comments
Custom on eBay
Previous / Next Custom Tutorial


 Update Your Tutorial
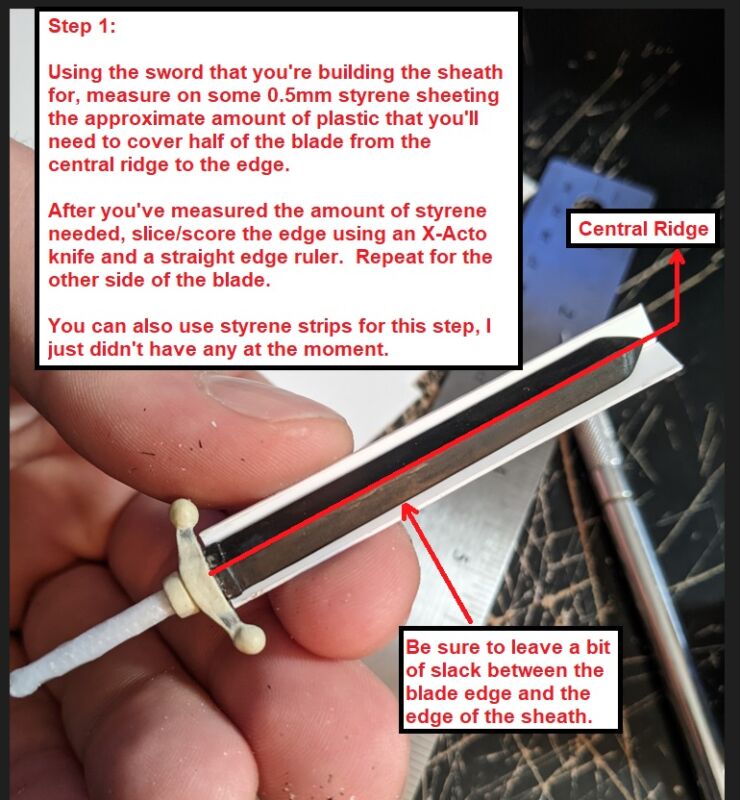