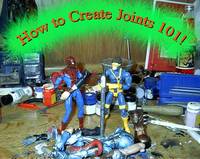
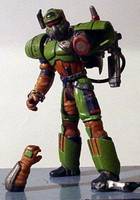
Using Magnets and Screws to Create Swivel Joints Custom Tutorial
Learn how to add simple swivels and magnetic joints to your figures.

Please wait...
How to Make Cut Joints and Magna-Joints!
This is a guide covers how to create simple Cut-Joints and Magna-joints. Below is a list of the things you'll need.
* Dremel Minimite tool.
* X-Acto knife.
* Super Glue.
* An assortment of small screws.
* Mini-Screwdriver set.
* RadioShack Rare-Earth magnets.
It's customizing time! Today we'll be covering how to make simple Cut Joints and how to use magnets to make Magna-Joints. These techniques are very simple and take just a little bit of practice to master. First up:
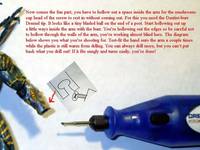
The Cut Joint
Here we'll be duplicating a normal Cut Joint that most action figures have. To get a feeling of what you're going to try and do, take apart a cut joint from a spare arm or leg using a hairdryer to heat the plastic. Examine how the "mushroom cap" head snaps into the wider area back inside the other piece. We'll be using a screw to duplicate the mushroom cap and drilling our own space in the other piece. Time to start cutting.
Now that you've created the shaft, you need to drill out the hole it will fit into. This may require some practice and I suggest watching your Dentist Burr bit to make sure it's not melting the plastic onto the end. If it does, you may need to drop the speed down on your Dremel.
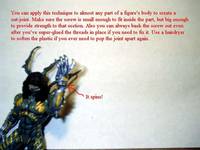
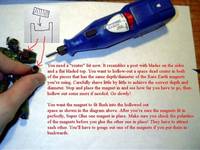
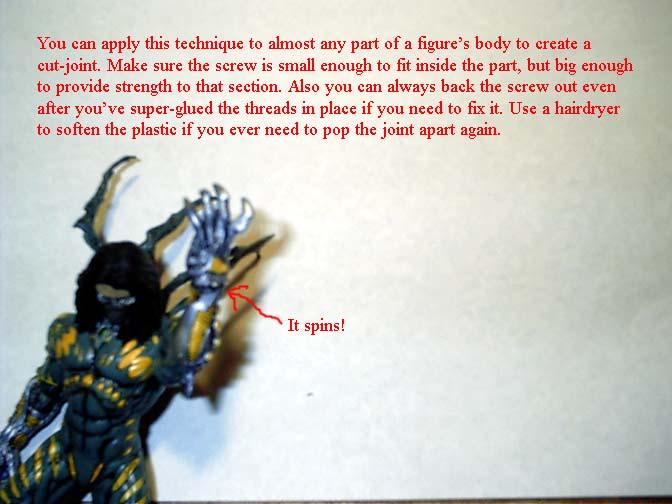
The Magna-Joint
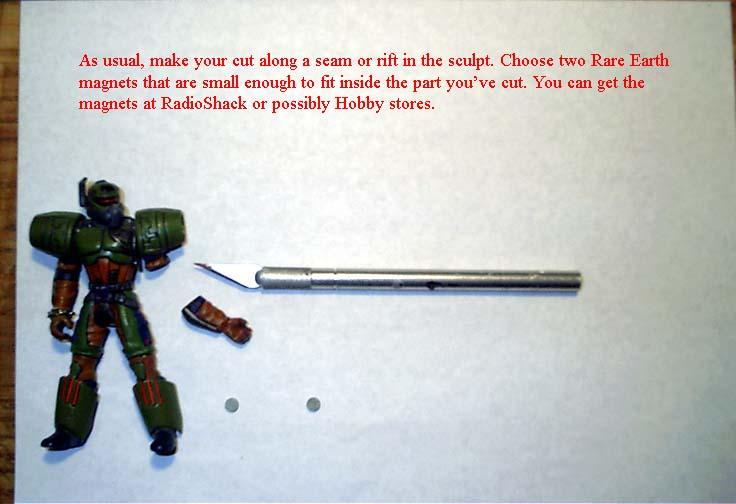
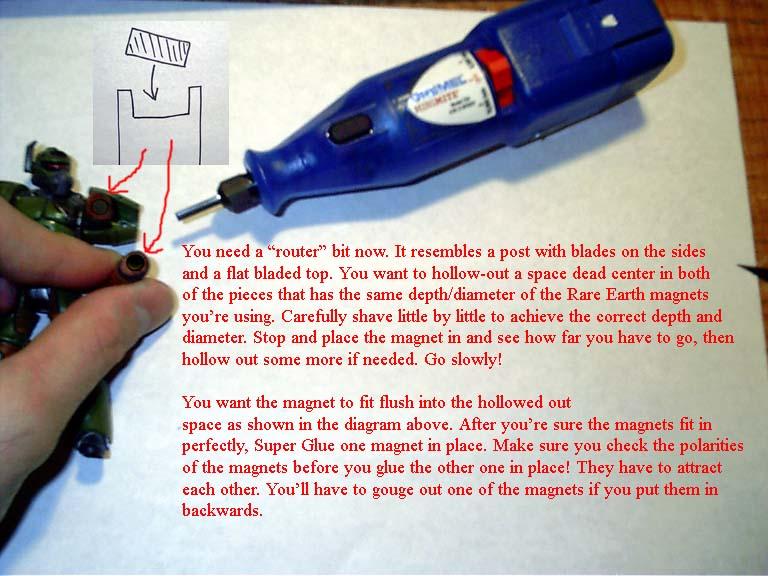
This joint is best used when you want to have a removable arm or hand that can be switched out quick and easy with another part. The Rare Earth magnets we will be using can be found at Radio Shack for about $2.95 for a package of two. They're very strong and can hold most parts of a figure together. I wouldn't suggest the smaller magnets for the torso area; you'll want to get bigger ones for that. Ok, time to start cutting!
Ta-dah! If done correctly, the Magna-Joint will spin just like a Cut-Joint and can be taken on and off easily. You can achieve all sorts of cool effects by burying magnets into different parts of your figures. You can make a weapon that attached to the back or leg of your figure, or even make detachable armor this way! The possibilities are endless. Enjoy!
Disclaimer
Customize at your own risk!
Customizing can be a fun, but dangerous hobby. These tutorials are contributed by other customizers. Some of the things recommended in the tutorials may be dangerous, such as the use of boiling water or sharp objects. You shouldn't attempt anything mentioned without adult permission and supervision. Figure Realm and/or the authors of the tutorials are not liable for any injuries or damages occurring from any attempt to follow suggestions in these tutorials.
User Comments
Custom on eBay
Previous / Next Custom Tutorial


![Using Magnets and Screws to Create Swivel Joints Custom Tutorial Picture #2 [The Cut Joint]](userimages/customtutorials/100/thumb_27-2.jpg)
![Using Magnets and Screws to Create Swivel Joints Custom Tutorial Picture #5 [The Magna-Joint]](userimages/customtutorials/100/thumb_27-5.jpg)
 Update Your Tutorial
what I do is I keep on sanding down until I get the right height proportions once that's done then I glue into place.
I usually cover up my cuts with some straps or some kind fodder belts.
I hope this works for you Merry Christmas and a Happy New Year.