Reducing Paint-rub in Joints Custom Tutorial
Here's how to help stop the paint from chipping-off at the joints.

Please wait...
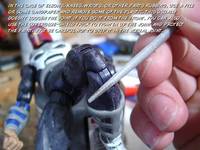
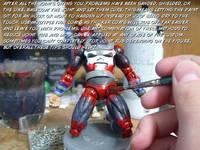
Well you've completed your custom and are pretty darn proud. You go to put him in a cool superhero pose but what's this?? The paint is coming off from the joints, arrrgh! Well you're not alone, joint rub and paint wear is a problem that plagues customizers day in and day out. Sometimes it's mild, sometimes it's glaring. This guide will help you reduce joint rub in many of the main places it shows up. Keep in mind every figure is different and sometimes one will require more extreme measures than another to stop the paint from rubbing. Using these tips you shouldn't need to take your figure apart. These tips use a Dremel, file, some sandpaper, an X-acto knife, and some superglue. With a little practice you should be able to nip joint rub in the bud!
Remember this is only a guide! I've come across figures where nothing but cracking the sucker open and sanding down/superglue-shielding all the rubbing edges work. Other times you'll only need to use a few of these tips. In any case work slow and don't get frustrated. Good luck!
Disclaimer
Customize at your own risk!
Customizing can be a fun, but dangerous hobby. These tutorials are contributed by other customizers. Some of the things recommended in the tutorials may be dangerous, such as the use of boiling water or sharp objects. You shouldn't attempt anything mentioned without adult permission and supervision. Figure Realm and/or the authors of the tutorials are not liable for any injuries or damages occurring from any attempt to follow suggestions in these tutorials.
User Comments
Custom on eBay
Previous / Next Custom Tutorial


 Update Your Tutorial
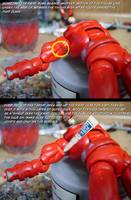
Flatten so it's all the same thickness
Cut off the excess
Flatten and cut off excess until it's the thickness you want
Once it's hard sand it smooth if you have to